Overview of VyOS
VyOS is a Linux-based network operating system that provides software-based network routing, firewall, and VPN functionality. The VyOS project was started in late 2013 as a community fork of the GPL portions of Vyatta Core 6.6R1 with the goal of maintaining a free and open source network operating system in response to the decision to discontinue the community edition of Vyatta. Here everyone loves learning, older managers and new users. VyOS is primarily based on Debian GNU/Linux and the Quagga routing engine. Its configuration syntax and command-line interface are loosely derived from Juniper JUNOS as modeled by the XORP project (which was the original routing engine Vyatta was based upon). Vyatta changed to the Quagga routing engine for release 4.0.
Why VyOS
- High-performance routing: Traffic distribution, network partitioning
- Consolidation: Merging single-purpose devices into one (IP routing, switching, firewall, VPN gateway, MPLS etc.).
- Enterprise-level reliability: Flexibility and redundancy at all network and software altitudes.
- Simplicity and stability: Reduction of operational expenses and streamlined network configuration.
- Support for IPv4 and IPv6: Relieves the pain of transitioning to IPv6 and ensures long-term stability.
- Routing resilient policies: Fine control over traffic flow through specific edge devices.
Features for All Network Device Roles

Tutorial Download & Instalasi VyOS di Platform perangkat IDNetWALL
- Ada 2 versi VyOS yaitu Rolling dan Stable (LTS) . Dan pengujian instalasi menggunakan VyOS Rolling Latest Version.
- Download VyOS versi Rolling disini. Download vyos-rolling-latest.iso.
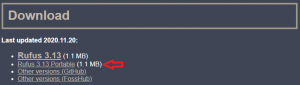
- Download aplikasi Rufus untuk create bootable USB versi portable disini.
- Create bootable Software VyOS ke flashdisk menggunakan aplikasi Rufus dengan langkah-langkah berikut:


- Hasil burning/bootable USB

- Verifikasi BIOS mode adalah: EUFI and Legacy
- Pastikan perangkat dalam keadaan Power-Off.
- Koneksikan perangkat ke Monitor.
- Koneksikan perangkat dengan USB Keyboard.
- Power-On perangkat. Saat awal perangkat Power-On, tekan tombol “DEL” secara berulang-ulang untuk masuk ke BIOS.
- Jika sudah masuk ke BIOS, maka Anda perlu memastikan BIOS mode di Menu “Advanced > CSM Configuration > Boot option filter“. Pilih EUFI and Legacy.

- Save Changes and Exit.

- Koneksikan bootable Flashdisk Software VyOS port USB perangkat.
- Power-On perangkat. Saat Awal booting perangkat, tekan “F11” untuk masuk ke opsi Boot BIOS. Kemudian pilih “EUFI: FlashDisk-Name, Partition 1”
- Live System (auto running).
- Muncul prompt login. Input default username: “vyos” dan password: “vyos”.
- Ketik “install image” untuk memulai instalasi VyOS.
- Would you like to continue? (Yes/No) [Yes]: tekan ENTER.
- Would you like to configure RAID-1 mirroring on them? (Yes/No) [Yes]: ketik no kemudian ENTER.
- Paritition (Auto/Parted/Skip) [Auto]: tekan ENTER
- Ikuti langkah berikutnya sesuai photo di bawah ini
- Change/input new password untuk user “vyos”.
- Which drive should GRUB modify the boot partition on? [sda]: tekan ENTER.
- Done! Menunjukkan bahwa instalasi software VyOS telah selesai/berhasil.
- Setelah instalasi selesai, reboot system dan remove flashdisk dari perangkat.
- Pada percobaan instalasi, kami mengkoneksikan perangkat dengan 2 kabel LAN
- LAN 1 (eth0) > sebagai WAN connection
- LAN 2 (eth1) > sebagai LAN connection

- Show Configuration. Pada tanap ini, instalasi software VyOS pada perangkat IDNetWALL telah berhasil dilakukan.
- Verifikasi IP address list, routing-table , dan internet connection (ping from LAN Address).