Overview of OPNsense
OPNsense is an open source, easy-to-use and easy-to-build HardenedBSD based firewall and routing platform. OPNsense includes most of the features available in expensive commercial firewalls, and more in many cases. It brings the rich feature set of commercial offerings with the benefits of open and verifiable sources.
OPNsense started as a fork of pfSense® and m0n0wall in 2014, with its first official release in January 2015. The project has evolved very quickly while still retaining familiar aspects of both m0n0wall and pfSense. A strong focus on security and code quality drives the development of the project.
OPNsense offers weekly security updates with small increments to react on new emerging threats within in a fashionable time. A fixed release cycle of 2 major releases each year offers businesses the opportunity to plan upgrades ahead. For each major release a roadmap is put in place to guide development and set out clear goals.
OPNsense Core Features.

And you can learn more about OPNsense features at the following link.
Tutorial Instalasi OPNsense di Platform perangkat IDNetWALL
- Download OPNsense disini. Tutorial instalasi menggunakan versi OPNsense-21.1.

- Version: Available latest version (Contoh instalasi versi 21.1)
- System Architecture: amd64
- boot: VGA (Contoh instalasi menggunakan VGA/HDMI monitor)
- Anda perlu “Extract” file extension .GZ menggunakan aplikasi winzip atau 7zip untuk mendapatkan file ekstensi .IMG yang akan diburning nantinya ke Flashdisk.

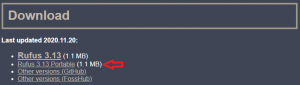
- Download aplikasi Rufus untuk create bootable USB versi portable disini.
- Create bootable Software OPNsense ke flashdisk menggunakan aplikasi Rufus dengan langkah-langkah berikut:
- Verifikasi BIOS mode adalah: EUFI only
- Pastikan perangkat dalam keadaan Power-Off.
- Koneksikan perangkat ke Monitor.
- Koneksikan perangkat dengan USB Keyboard.
- Power-On perangkat. Saat awal perangkat Power-On, tekan tombol “DEL” secara berulang-ulang untuk masuk ke BIOS.
- Jika sudah masuk ke BIOS, maka Anda perlu memastikan BIOS mode di Menu “Advanced > CSM Configuration > Boot option filter“. Pilih EUFI only.


- Save Changes and Exit.

- Koneksikan bootable Flashdisk Software OPNsense ke port USB perangkat.
- Power-On perangkat. Saat Awal booting perangkat, tekan “F11” untuk masuk ke opsi Boot BIOS. Kemudian pilih “EUFI: FlashDisk-Name, Partition 1”
- Initial boot software installation
- Ketiika muncul “Press any key to start the manual interface assignment”, Anda harus cepat menekan tombol “Enter” atau tombol apapun untuk memulai installasi. Note: waktu hanya tersedia beberapa detik.
- Do you wan to configure VLANs now? input N kemudian Enter.
- Input Interface WAN dan LAN.
- Enter the WAN interface name or ‘a’ for auto-detection: input igb0 kemudian Enter
- Enter the LAN interface name or ‘a’ for auto-detection: input igb1 kemudian Enter
- Enter Do you want to proceed? input y kemudian Enter

- Configuring Process.
- Muncul prompt login. Input login: “installer” dan Password: “opnsense”.
- Ok, let’s go.
- Accept these Settings
- Guided Installation
- Select a Disk > Pilih “ada0”
- Select install mode > GPT/EUFI mode
- Swap Partition > Yes
- Executing Command Process.
- Set Root Password > Accept and Set Password
- Reboot
- Instalasi software OPNsense telah selesai, pada tahap ini cabut USB Drive / Flashdisk dari perangkat.
- Setelah selesai proses Reboot, makan kan muncul login prompt. Input login: “root” dan Password: adalah password telah Anda set saat proses instalasi.
- Pada percobaan instalasi, kami mengkoneksikan perangkat dengan 2 kabel LAN
- LAN 1 (igb0) > sebagai WAN connection
- LAN 2 (igb1) > sebagai LAN connection

- Console CLI OPNsense dan testing ping ke internet (DNS Google IP: 8.8.8.8).
- Akses Web Console Admin OPNsense ke IP LAN https://192.168.1.1
- Error self-sign certificate:

- Login

- Initial Config


- Dashboard. Pada tahap ini, instalasi software OPNsense telah berhasil dilakukan.