Overview of Citrix Hypervisor (XenServer)
XenServer, developed by Citrix Systems, is an open-source hypervisor (a computer software, firmware, or hardware for creating and running virtual machines-VMs) platform. It is built over the Xen hypervisor for creating and managing desktop, server, and cloud virtualization infrastructure. It helps to deploy, host, and manage VMs and distribute hardware resources like CPU, memory, storage, and networking to the VMs.

The feature-packed advantages of Citrix XenServer / Citrix Hypervisorypervisor in
- Easy Virtualization of Workload: The fast-running VMs allow the installation and running of software in minutes without the need to configure a complex management infrastructure or involving a dedicated storage network. The virtualization of your workload can start immediately after installing the XenServer. You also have the option of converting the server workloads and turning them into VMs. The Citrix XenMotion migration tool allows moving the VMs across a resource pool without any loss of resources.
- Robust Server Management: Citrix XenServer is designed to create and manage any kind of virtual infrastructure, automate, and integrate management processes to turn complex IT environments into simpler ones.
- Powerful XenCenter Console: It is a Windows-native graphical user interface (GUI) for managing XenServer. With its help, the admins can closely monitor, administer, and manage several VMs coming from a centralized management console. Additionally, a user with just a few clicks can control the VMs (such as create, start, stop, migrate, copy, or backup).
- XenConvert: XenConvert is a physical-to-virtual (P2V) adaptation tool for converting Windows OS, data, and applications from a physical machine to XenServer compatible VMs thus making the transition smooth.
- Security: The admins can create policies to automatically collect the snapshots of the regularly scheduled VMs and organize them in an archive. This also ensures that in case of an outage a VM could be quickly recovered to its original version. XenServer Enterprise Version comes with Direct Inspect (APIs) to give protection against malware, viruses, and rootkits and allows third-party vendors to secure the OS. The Measured Boot feature safeguards the hypervisor ensuring that the VMs run only on authorized hardware.
- Server Outage Protection: In the case of a server outage, the protected VMs can be automatically restarted from another server with minimum downtime.
- Improved Application Performance: The dynamic memory feature of XenServer helps to share the unused server memory between the VMs thus optimizing the number of VMs involved with improved app performance.
- Workload Balancing and Distributed Virtual Switching: The workload balancing eliminates any possibility of performance bottlenecks during the migration of the VMs to a new location (within a resource pool) while the distributed virtual switching help to create a network of network fabric for handling multi-tenancy.
Tutorial Download & Instalasi Citrix XenServer di Platform perangkat IDNetWALL
- Download Citrix XenServer dan XenCenter disini. Catatan: Anda perlu melakukan registrasi untuk dapat men-download dari portal Citrix. Contoh instalasi menggunakan versi 7.6 Free Edition.
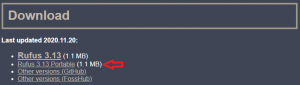
- Download aplikasi Rufus untuk create bootable USB versi portable disini.
- Create bootable Citrix XenServer ke flashdisk menggunakan aplikasi Rufus dengan langkah-langkah berikut:
- Verifikasi Intel (VMX) Virtualization Technology telah di-Enabled.
- Pastikan perangkat dalam keadaan Power-Off.
- Koneksikan perangkat ke Monitor.
- Koneksikan perangkat dengan USB Keyboard.
- Power-On perangkat. Saat awal perangkat Power-On, tekan tombol “DEL” secara berulang-ulang untuk masuk ke BIOS.
- Jika sudah masuk ke BIOS, maka Anda perlu memastikan BIOS mode di Menu “Advanced > CPU Configuration > Intel (VMX) Virtualization Technology “. Pilih [Enable].


- Save Changes and Exit.

- Koneksikan bootable Flashdisk Software Citrix XenServer ke port USB perangkat.
- Power-On perangkat. Saat Awal booting perangkat, tekan “F11” untuk masuk ke opsi Boot BIOS. Kemudian pilih “FlashDisk-Name”
- Welcome to XenServer. <ENTER> untuk memulai instalasi.
- Select Keymap > OK.
- Welcom to XenServer Setup > OK.
- End User License Agreement > Access EULA.
- Warning > OK.
- Virtual Machine Storage > sda – SSD > OK.
- Select Installation Source > Local media > OK.
- Verify Installation Source > Skip verification > OK.
- Set Password > Fill password > OK.
- Networking > [select active interface] > OK .
- Networking > Input IP Address Static / DHCP > OK.
- Hostname and DNS Configuration > Fill Form > OK.
- Select Time Zone > Selecting > Ok.
- System Time > Using NTP / Manual time entry > Ok. Contoh. Menggunakan NTP, kemudian input NTP Server dan OK.
- Confirm Installation > Install XenServer.
- Installation Process.


- Supplemental Packs > Yes / No.


- Installation Complete > OK.
- GRUB Option > XenServer (Auto Running).
- XenServer 7.6 Monitor Console Display.
- Install aplikasi XenCenter yang telah didownload sebelumnya, dan buka aplikasi tersebut.
- Add a Server.

- Input IP Address XenServer, Username root, dan password yang telah Anda setup saat proses instalasi.

- Console Citrix XenServer via XenCenter. Pada tahap ini proses instalasi Software Citrix XenServer telah berhasil dilakukan.